Important Notice

Due to issues beyond our control, we’ve unfortunately had to temporarily close the workshop following a site wide electrical fault affecting our premises.

As a result, any incoming orders will not be able to be fulfilled until further notice. We are working closely with the relevant parties to resolve the issue as quickly as possible and minimise disruption wherever we can.

We really appreciate your patience and understanding during this time and will share further updates as soon as we are able to resume normal operations.

Thank you.

Custom Quote

Tell us a few details about what you're looking for and we’ll provide a custom quote based on your requirements.

Contact Details

This field is required.

Specifications

Product
This field is required.

Artwork

Do you already have artwork or branding ready?
This field is required.

Timeline

How soon do you need them?
This field is required.

Vinyl Wall Coverings

Vinyl wall coverings offer a reliable solution for printed wall graphics that need to perform in demanding interior environments. Suitable for smooth, sealed walls and challenging surfaces, they provide a strong, permanent hold while delivering crisp, high-quality visuals. Ideal for commercial spaces where durability and presentation are key.

» Strong, Permanent Adhesion 
» High-Quality Printed Finish
» Ideal for Commercial Interiors

Get a Custom Quote


The overall width of your wall.
The overall height of your wall.
Lamination protects prints and helps them last longer.
Drag files here or browse
Please refer to our artwork guidelines before uploading your artwork.
Please email your artwork to sales@thesigncollective.co.uk along with your order number.
Have your wall coverings designed by our team. A proof will be emailed to you for approval before production.
Please tell us what you would like on your wall coverings, including any text, colours or style preferences.
Drag files here or browse
Upload your logo, icons or any reference images here.
Your Price:

Description

Vinyl wall coverings are well suited to commercial interiors where a durable, long-term finish is required. Designed to bond securely to smooth, sealed walls and other surfaces that can otherwise be difficult to apply to, they are a reliable option for permanent wall graphics. The tough finish stands up well to everyday use, making them ideal for high-traffic areas such as corridors, reception spaces, guest areas, and shared environments.

Durable Vinyl Wall Coverings for High-Traffic Spaces

Commonly used across retail, hospitality, offices, and public spaces, vinyl wall coverings allow printed graphics to be applied at scale while maintaining a clean, consistent appearance over time. When laminated, the surface is easy to clean and low maintenance, supporting environments where hygiene and regular cleaning are important. Suitable for both full wall coverage and feature areas, vinyl wall coverings offer a practical, long-term solution for interior wall graphics.

For simpler, block colour designs such as lettering or logo graphics, see our Cut Vinyl Graphics.

Suitable For

Suitable For

Retail & Point of Sale

» High-traffic areas such as shop floors, corridors, and showrooms
» Branded feature walls

Hospitality & Leisure

» Hotels, restaurants, cafes, and bars
» Hotel rooms, lobbies, and reception areas

Corporate & Commercial Spaces

» Offices, meeting rooms, and communal areas
» Branded interiors and permanent wall graphics

Public & Healthcare Environments

» Hospitals, clinics, and other public-facing spaces
» Corridors, waiting areas, and high-traffic zones

Artwork Guidelines

Artwork Guidelines

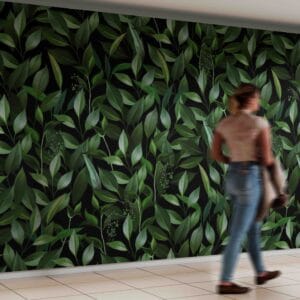
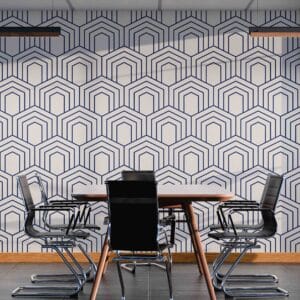
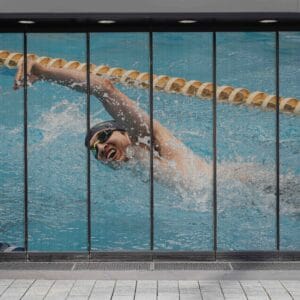
To ensure your vinyl wall coverings are produced accurately and to the highest standard, please follow these guidelines before submitting your design files. Supplying artwork correctly helps avoid production delays and ensures your wall coverings are printed exactly as intended.

Accepted File Formats

We recommend supplying your artwork in one of the following formats:

» PDF (preferred)
» SVG
» PNG

Artwork Size

To achieve the best results, please submit your artwork at the full width and height of your wall, including a 50mm bleed around the entire piece.

Bleed & Safe Areas

To help prevent unwanted white edges when cutting, please:

» Include at least 50mm bleed on all sides of your design
» Keep important text and graphics at least 100mm inside your design
» Ensure background colours or images extend fully into the bleed area

We will tile your artwork into 1000mm wide drops, with two end pieces supplied at 1050mm wide to accommodate any discrepancies in the wall, ready for straightforward application. Each drop includes a 50mm top and bottom bleed and a 10mm bleed on each side, which is intentionally overlapped onto each subsequent piece to ensure all drops line up correctly. The top and bottom bleed provides extra material for trimming once installed, allowing for slight adjustments if the wall isn’t perfectly straight, resulting in a clean, precise finish along all edges.

Colour Setup

» Supply artwork in CMYK colour mode
» RGB files may result in colour shifts during printing

If colour accuracy is critical, we recommend discussing this with us before artwork sign-off.

Fonts & Text

» Convert all fonts to outlines
» Avoid very small text, especially near the top and bottom edges of your design
» Minimum recommended font size is 36pt, depending on font style

Please make sure to convert all text to outlines so your fonts print exactly as intended.

Image Resolution (Raster Files)

» Raster images should be at least 300dpi at final size
» Low-resolution images may appear blurry or pixelated when printed

Final Checks Before Submission

Before sending your artwork, please ensure:

» Artwork dimensions are correct
» A minimum of 50mm bleed is included
» Fonts are outlined

Need Help With Your Artwork?

If you’re unsure whether your artwork meets these guidelines, please get in touch so we can review your files. Catching any issues early helps keep your project on schedule and avoids any unexpected delays. We will also provide an artwork proof before production begins to ensure you are completely happy with the design.

Order Process

Order Process

» Step 1 – Submit Your Artwork

Send us your artwork following our guidelines, including bleed and outlined text.

» Step 2 – Artwork Review

Our team will carefully review your artwork files to ensure everything is set up correctly to be tiled for production.

» Step 3 – Proof Approval

We will send you an artwork proof for your approval. This gives you the chance to check your design and request any reasonable adjustments before we start production.

» Step 4 – Production

Once the proof is approved, your order moves into production. We ensure your vinyl wall coverings are printed and trimmed to the dimensions of your wall.

» Step 5 – Delivery

Your completed order is carefully packaged and delivered to you, ready to install.

Installation Guidance

Installation Guidance

» Step 1 – Prepare the wall

Ensure the wall is clean, dry, and smooth. Remove dust, grease, old adhesive, or loose paint. Fill any holes or imperfections and lightly sand if needed. Wipe the wall clean to remove all debris.

» Step 2 – Plan your layout

Measure the wall and plan the drop placement. Each vinyl drop has a 10mm side bleed and 50mm top and bottom bleed. The side bleed is intentionally overlapped onto the next drop to ensure proper alignment, while the top and bottom bleed provides extra material for trimming. The additional 50mm bleed on the end pieces allows the drops to be butted into the adjoining wall, accommodating walls that are not perfectly straight.

» Step 3 – Mark a vertical guideline

Use a spirit level or plumb line to mark a straight vertical line where the first drop will be positioned. This ensures the rest of the drops are aligned correctly.

» Step 4 – Peel and position the first drop

Peel the backing from the top of the first drop. Position it along your guideline, leaving the 50mm top bleed and butting the additional end-piece bleed neatly into the adjoining wall. Smooth from the centre outward to remove air bubbles, working down gradually as you peel more backing.

» Step 5 – Install subsequent drops

Position each following drop so it overlaps the 10mm side bleed of the previous drop. Align the pattern carefully before peeling the backing and smoothing from the centre outward.

» Step 6 – Trim top and bottom excess material

Once all drops are installed, trim the 50mm top and bottom bleed using a sharp blade and straight edge. Ensure clean edges along ceilings, skirting boards, and any adjoining walls. Take care when trimming, as the vinyl may lift paint if it has already adhered.

» Step 7 – Final checks

Check all seams are smooth and properly overlapped. Smooth out any remaining air bubbles and wipe away any dust or residue with a dry or slightly damp cloth if needed.

Shopping Basket
Scroll to Top